Checking air brakes on a semi-truck: 7 steps to follow
By The Schneider Guy
Estimated reading time: 3 minutes
As a truck driver, one of the steps in your pre-trip inspection is making sure your air brakes are in good operating order before hitting the road. Properly functioning air brakes are essential for safe driving.
Schneider is known for delivering thorough training, which is why key skills like this are covered in both our paid CDL training program and new driver orientation.
Below, we’ll walk you through the essential steps to checking air brakes on your semi-truck.
Key takeaways:
- Checking air brakes on a semi-truck is a vital step of your pre-trip inspection because properly functioning brakes are essential for safe driving.
- You must visually inspect the individual components of the air brake system before moving on to your in-cab air brake tests.
- Make sure you are safely parked on level ground and your wheels are chocked before starting the inspection process.
- Finish the inspection with a service brake test to ensure your unit stops without pulling or making grinding noises.
Air brake inspection with an expert
See for yourself how to properly check your air brakes with the help of Schneider Driver Ambassador, Dean Garvelink.
How to visually inspect your air brakes
Before completing your in-cab air brake tests, you need to visually inspect the individual components of the air brake system during the walkaround portion of your pre-trip.
1. Set up safely.
Make sure you are parked on level ground and that the wheels are chocked to prevent the vehicle from moving. You also need to release the parking brakes so you can move the slack adjusters.
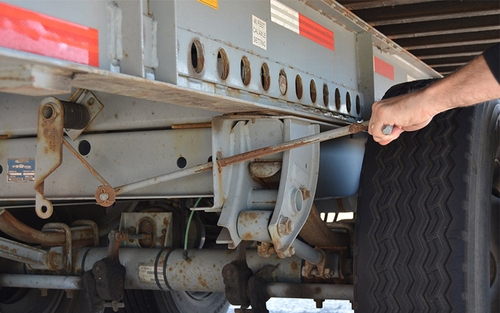
2. Check slack adjusters on S-cam brakes.
Start by checking your slack adjusters:
- Wear gloves and pull hard on each slack adjuster you can reach.
- Adjust the slack adjuster if it moves more than about one inch from where the push rod attaches to it.
- Make sure to listen for any leaks while inspecting the brake system.
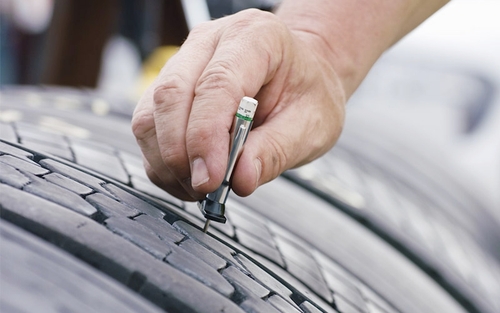
3. Check brake drums, linings and hoses.
You also need to check the following during your inspection:
- That the brake drums do not have any cracks longer than one half the width of the friction area.
- That the brake lining is not loose, cracked or soaked with oil or grease.
- That the brake lining thickness is no less than a ¼ of an inch at the center.
- That the air hoses connected to the brake chambers aren’t cut or worn due to rubbing.
How to complete an in-cab air brake test: Step-by-step guide
Once your walkaround is complete, you can move on to the in-cab air brake tests. These are the main seven steps to complete:
1. Check air compressor governor cut-in and cut-out pressures.
With the engine running and both tanks above 100 PSI, pump down on the brake pedal until the air pressure is just below 90 PSI. Stop pumping, and the compressor should begin to build air pressure.
Let pressure build until the air stops building. The air pressure should quit building at approximately 120 PSI. You will know the compressor cut out when you hear air exhaust from the air dryer or see the gauge has stopped rising.
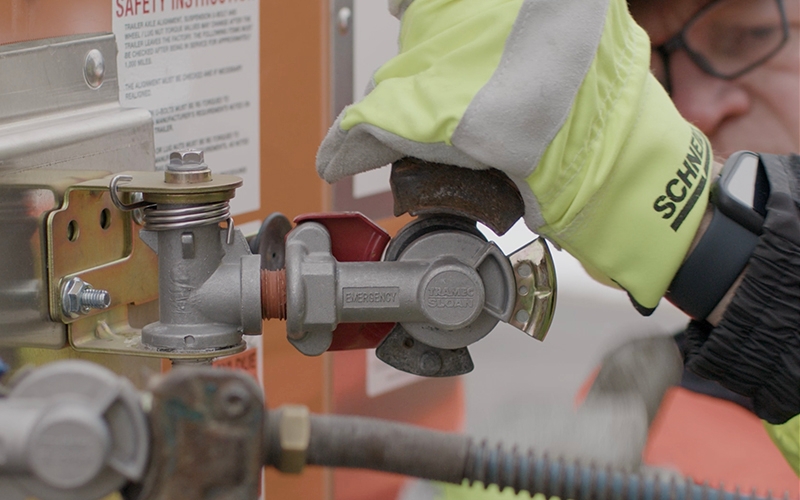
2. Test air leakage rate.
Next, shift the transmission into N, turn the engine off and leave the key in the ON position without starting the truck. Keep both feet on the floor and roll the window down.
Release all the brakes by pushing the red and yellow buttons in. Allow the air pressure gauges to stabilize.
Then, to complete your applied pressure test and check for leaks, push the brake pedal down firmly and hold for one minute. Watch the air gauges and listen out the window for signs of air leaks.
Air loss should not exceed 4 PSI for a combination vehicle, or 3 PSI for a tractor only.
3. Test low pressure warning signal.
Next, complete the warning light and buzzer test. To do this, step on and off the brake pedal repeatedly to reduce the air tank pressure. The low air pressure warning signal must come on before the pressure drops to less than 60 PSI in the air tank, or half of the maximum pressure.
4. Check that spring brakes come on automatically.
Next, complete the protection valve pop-out test. To do this, continue to fan off the air pressure by stepping on and off the brake pedal to reduce tank pressure.
Both buttons on the dash should pop out when the air pressure falls to approximately 20-45 PSI. This will cause the spring brakes to come on.
5. Check rate of air pressure buildup.
Next, remove the chock blocks and stow them away. Ensure the truck is off while doing this.
Then, enter the cab and start the engine to build up air pressure. Hold the accelerator at around 1200 RPM and watch the air gauges.
When the engine is at operating rpms, the pressure should build from 85 to 100 PSI within 45 seconds.
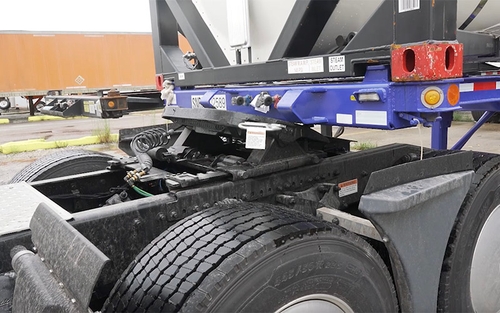
6. Trailer and parking brake test.
Next, place the transmission into D and push the yellow button in. Gently pull against the trailer parking brakes. Your unit should move but not drag the trailer.
Then, pull the yellow button out and push the red button in. Gently pull against the tractor parking brakes. Your unit should not move.
7. Service brake test.
For your final test, push the yellow button in. Both buttons should be pushed in at this point.
Now, drive forward slowly at about 5 mph and apply the brake firmly. Your unit should stop with no pulling to either side and without any grinding noises.
Please note this is an example of how to check air brakes on a semi-truck. It is important to remember the type of driver you are, the company you work for and the type of truck you drive can impact how you complete this process. Be sure to consult your company guidelines or speak with your leader for more information.
Wondering what else a pre-trip inspection covers?
Schneider Guy loves the "Big Orange." He's passionate about the trucking industry and connecting people to rewarding careers within it. He's been the eyes and ears of our company since our founding in 1935, and he's excited to interact with prospective and current Schneider associates through "A Slice of Orange."