Complete pre-trip inspection checklist for truck drivers
By The Schneider Guy
Estimated reading time: 4minutes
As a truck driver, performing a CDL pre-trip inspection is one of the most common and repeated tasks you will complete. Pre-trip inspections helptruck drivers ensure their tractor and trailer are safe tooperate before hitting the road.
Keep reading to learn what a pre-trip inspection is and what should be on apre-trip inspection checklist.
Key takeaways
- Truck drivers should conduct a pre-trip inspection before they operate their truck and trailer.
- A pre-trip inspection checklist for truck drivers covers critical components like the engine, brakes, tires, fifth wheel and suspension, among other items.
- The exact steps and items in a pre-trip inspection depend on the type of driver you are, the type of truck you drive and the company you work for.
What is a pre-trip inspection?
A pre-trip inspection includes checking over the tractor and trailer a truck driver will be operating. A pre-trip should be completedbefore the operation of a vehicle:
- At the beginning of a driver’s shift.
- Any time a new trailer is picked up.
- After a 10-hour break.
A thorough inspection usually takes anywhere from 30 minutes to one hour and should be logged as on-duty, not driving (line 4).
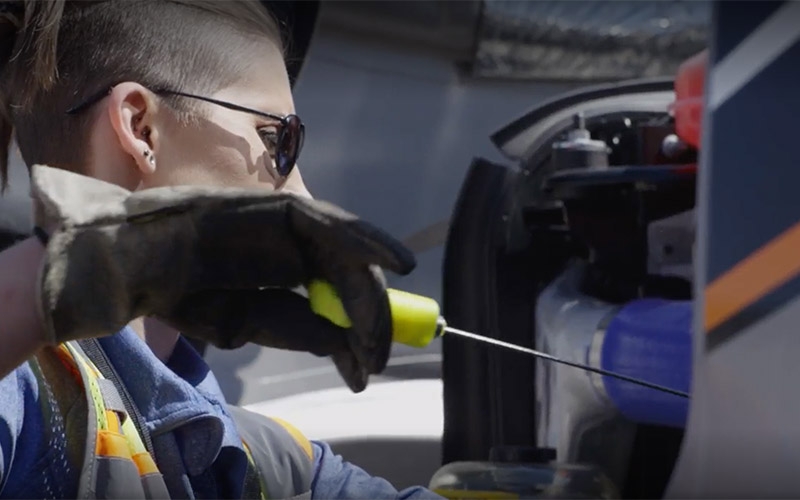
How to complete a CDL pre-trip inspection
CDL pre-trip inspection checklist
1. Passenger-side engine:
- Air filter housing: Secure mounting, cover in place.
- Windshield washer fluid reservoir: No leaks, proper fluid level.
- Turbocharger: No oil or exhaust leaks.
- Engine air ductwork: No cuts, clamps secured.
- Alternator: Mounting secured, no broken or loose wire.
- Accessory drive belt: Not cracked or frayed.
- Air conditioner compressor: Secure mounting.
2. Front brakes (covers all five brake components):
- Brake drum: No cracks.
- Brake lining: No cracks or damage.
- Slack adjuster: Proper angle to the brake chamber, clevis and cotter pin intact.
- Brake air line: No bulges or cuts, fitting tight.
- Brake chamber: Mounting bolts secured, band clamp secured.
3. Front wheel:
- Tire: ABCs (abrasions, bulges, cuts), pressure = 120 PSI, tread depth = 4/32 min (DOT).
- Wheel: Not cracked or bent.
- Hub oil: Not leaking, at proper level – if it’s a sealed unit, can’t check level.
- Oil seal (outer): Not leaking.
- Valve cap: Not missing.
- Lug nuts: None missing, no streaks or shiny areas, none loose.
4. Driver side of engine:
- Radiator brace: No cracks or missing bolts.
- Radiator: Not leaking, secure mounting.
- Water pump: No cracks, not loose or leaking.
- Fuel water separator/filter: Not leaking, secure mounting.
- Pitman arm/drag link: Not cracked, castle nut secured with cotter pin.
- Steering gear box: Secure to frame, not leaking.
- Power steering reservoir: Secure mounting, no leaks, proper level.
- Dipstick: Right level, secured after check.
- Steering shaft: Secure, not loose or damaged.
- Fuel pump: No cracks, not loose or damaged.
- Engine air ductwork: No cuts, clamps secured.
- Oil filler cap: Secure, no cracks.
- Engine coolant reservoir: No leaks, proper fluid level.
5. Steer axle suspension:
- U-bolts: No cracks, no loose or missing nuts.
- Leak spring: No cracks, not loose or shifting.
- Tie rod: Secured with castle nuts and cotter pins.
- Shock absorber: Secure mounting, not leaking oil.
- Axle: Not cracked.
6. Rear suspension:
- Spring mount: No cracks, secure mounting.
- Tire: ABCs (abrasions, bulges, cuts), pressure = 110 PSI, tread depth = 2/32 min (DOT).
- Airbag (bellows): Fully inflated, secure mounting, not ruptured.
- Shock absorber: Secure mounting, not leaking oil.
7. Side of cab:
- Mirrors: Secure mounting, no broken glass.
- Doors: No damage, glass not broken, hinges secured, opens and closes well.
- Lights and turn signals: Working, not cracked.
- Steps: Mounted, secured to skirting.
- Battery box: Secure mounting, cover latched.
- DEF cap: Cap secured.
- Fuel cap/tank: Gasket in place, vent in place, chain secures the cap to the tank.
- Side skirting: No damage, panels secure.
- Side box: Secured, safety triangles present.
- Side of sleeper berth: No body damage.
- Sleeper berth window: No cracks.
8. Rear of cab:
- Electrical cord: No bare wire, no corrosion, check the plug at the end of the cord.
- Air line: Not tangled or worn, rubber grommets not worn, fittings tight.
- Cab shock absorber: Secure mounting, not leaking oil.
- Cab airbag (bellows): Not ruptured, securely mounted.
9. Driveshaft/rear frame:
- Driveshaft: Not cracked.
- Universal joint: Not cracked, not missing bolts, no shiny areas.
- Differential: Not leaking oil.
- Frame: Straight, no non-factory welds.
10. Fifth wheel area:
- Pivot pin: Keeper pin and cotter key intact.
- Slider lock pins: Fully engaged.
- Release arm: Not bent.
- Slider rail: No broken welds or missing bolts.
- Slider stop blocks: Welds not broken, not missing bolts.
- 5th wheel platform: Well-greased, tilted down.
11. Front of trailer:
- Top rail: No cracks or collision damage.
- Clearance lights: Not broken, working properly.
- Registration: Not missing, readable.
- Document box: Not missing or loose.
- Air line/glad hands: No bulges or cuts in air lines, rubber grommets not damaged on glad hands.
- Electric hook up: No broken pins, cover intact.
- PM sticker: Current, legible.
- Height sticker: Legible, legal for route.
- Placard holder: Not broken or missing rivets.
- Tracking device: No cracks or collision damage.
12. Side of trailer:
- Top rail: Not cracked, no collision damage.
- Clearance light: Not broken, operational.
- Bottom light: Not cracked, no collision damage, no missing bolts.
- Landing gear: Legs straight, no broken welds in bracing, sand pads secured and clean handle in cradle.
- Reflector tape: Clean.
- Side panels: No holes or cuts, no missing rivets.
13. Rear of trailer:
- Latches: Secured, not damaged.
- Reflector tape: Clean.
- Lights: Not broken or missing, operational.
- Splash guard: Brackets and guard secured.
- License plate: Secure and clean, light is working.
- Bumper: Not damaged, no broken welds.
- Door hooks: Not loose, no missing bolts.
- Hinges: Not cracked, no missing bolts on both sides.
- Door seals: No separation, no rubber tubing sticking out.
14. Trailer suspension:
- Air line: No bulges or cuts, fittings are tight and not rubbing.
- Axle: Not bent or broken.
- Clevis pin/cotter key: Not missing.
- Slack adjuster: Proper angle, clevis pin and cotter pin intact.
- Brake linings: Minimum of ¼ inch thick, not cracked.
- Brake drum: Not cracked.
- Tire: (ABCs), tread depth = 2/32, air pressure = 110 PSI.
- Spring: Not broken, not shifted.
- Spring mount: No broken welds.
- U bolts: Not loose, not cracked.
- Torque rod: Secure mounting, bushings intact.
- Spring brake chamber: Secure mounting, band clamp secure.
15. Gauges/inside the truck:
- Fuel: Matches visual when looking in the tank.
- Def level: Maintain a minimum of one light bar.
- Oil pressure: 25-50 PSI.
- Speedometer: 0-60 MPH.
- Air pressure: 90-120 PSI.
Please note that the list above is just an example. It is important to remember the type of driver you are, the company you work for and the type of truck you drive can impact your CDL pre-trip inspection. Be sure to consult your company guidelines or speak with your leader for more information on your post-trip inspection requirements.
Get more great driving tips and guides.
Schneider Guy loves the "Big Orange." He's passionate about the trucking industry and connecting people to rewarding careers within it. He's been the eyes and ears of our company since our founding in 1935, and he's excited to interact with prospective and current Schneider associates through "A Slice of Orange."